Back with some vinyls and a very fun mani, splatter nails.
De vuelta con mas vinilos y un diseño muy divertido, uñas salpicadas.

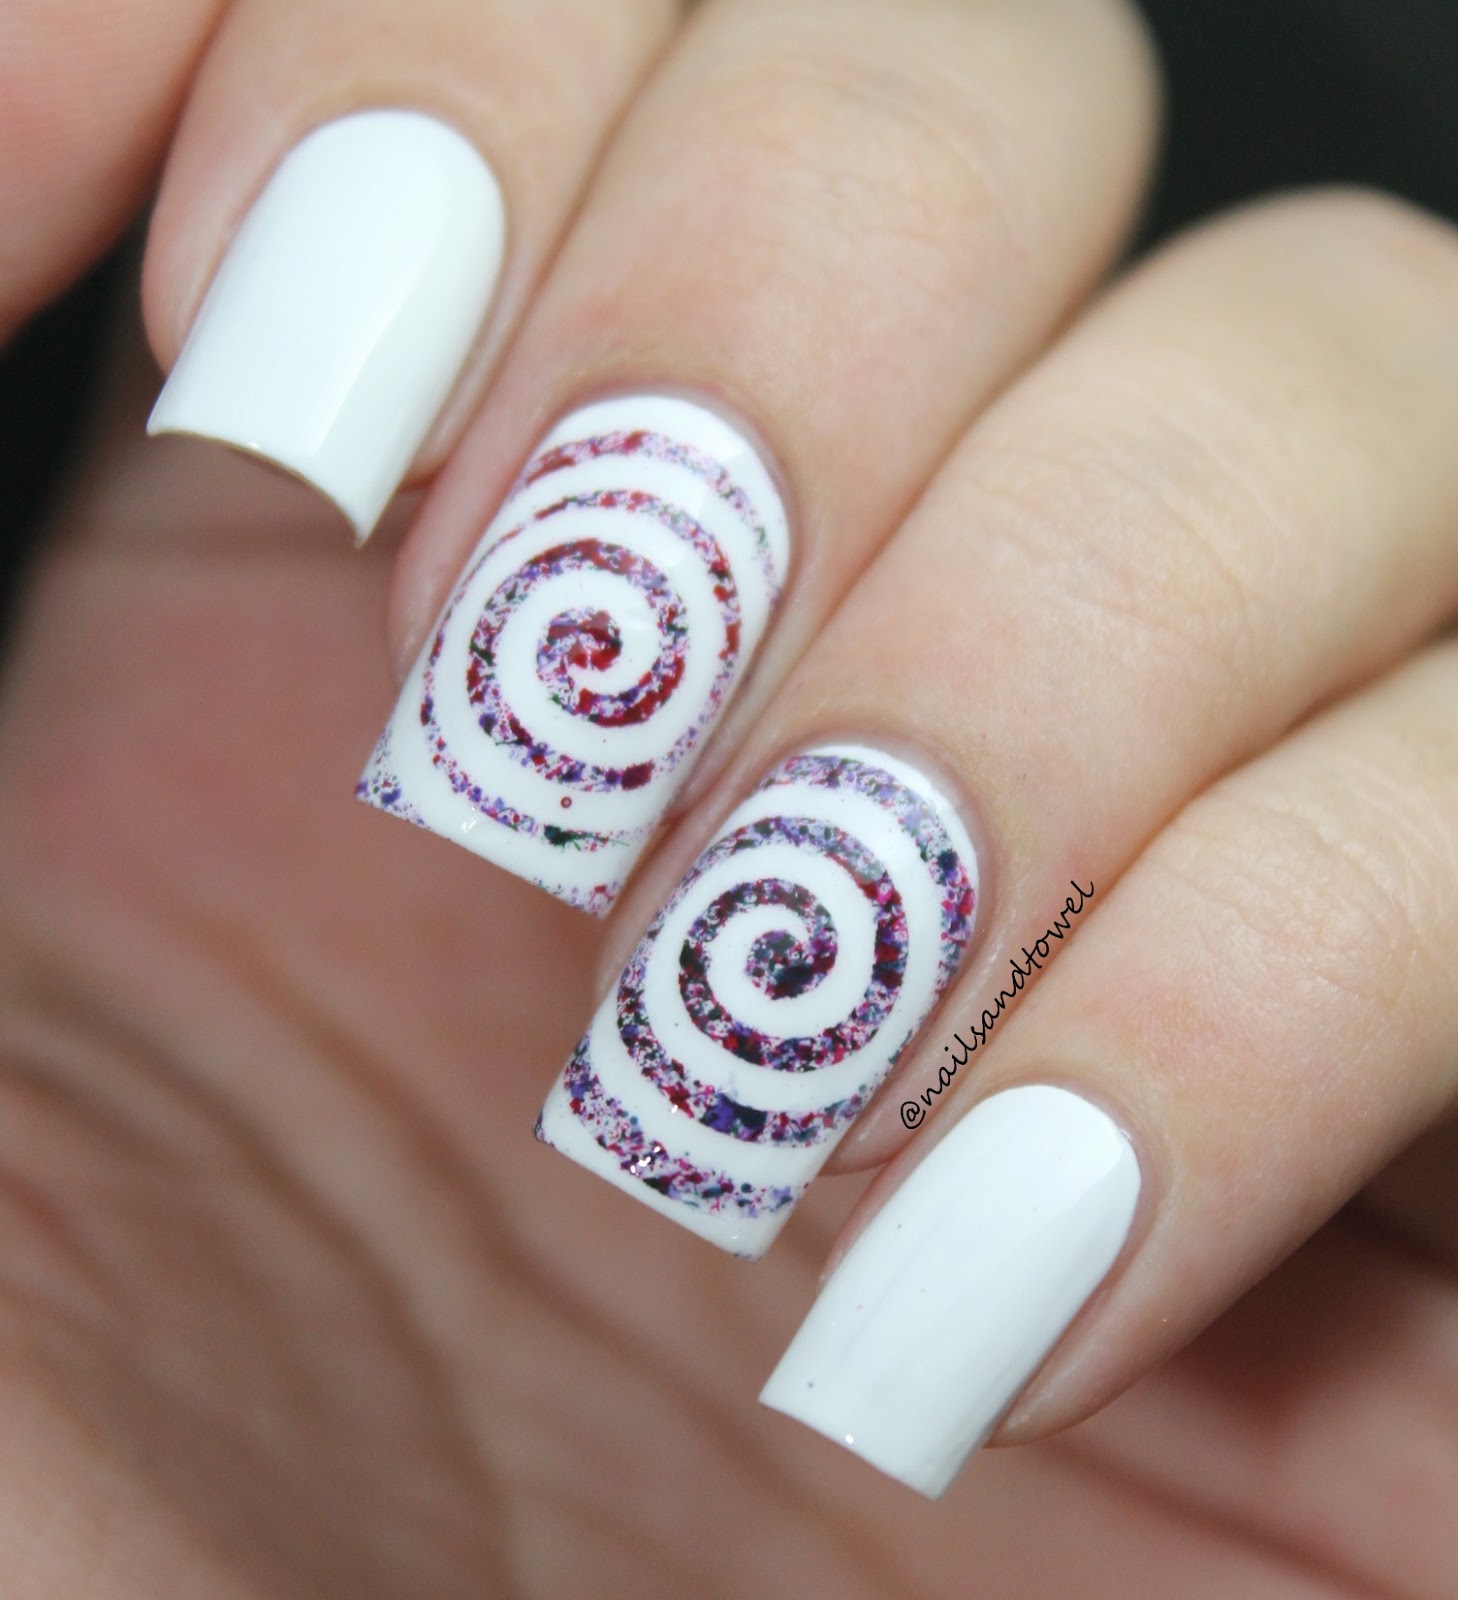
The base color I used is "Alpine Snow" by OPI. I still don't love this polish, is thick and not self-leveling. I have seen swatches of this polish but they seem so smooth and a good review, but it does not work for me.
Mi color base es "Alpine Snow" de OPI. Yo aun no amo este esmalte, su formula es gruesa y no se nivela correctamente. He visto otras usandolo y al parecer una buena reseña sobre este, pero aun no funciona conmigo.
hib.JPG)
ygiub.JPG)
For this techinque, I used a toothbrush and 5 polishes, instead of using neon rainbow colors, I went with dark colors because neons have become such a cliche.
The polishes I have used are
"Neptuno" (Dark blue)
"Manzana Fatal" (Dark red)
"Cereza" (Cherry)
All 3 by Vogue Fantastic.
"Christmas Gone Plaid" (dark green) OPI.
"Dark Purple" (no name) Esmaltes Darosa
Topcoat
"Super Shine" Sally Hansen
Para esta tecnica, use 5 esmaltes y un cepillo de dientes, en vez de usar colores neones en arco iris, decidi irme con colores oscuros porque los neones ya estan desgastados, son un cliche.
Los esmaltes usados mencionados anteriormente.

What I did:
First I painted my nails with white base and let it completely dry.
Then I placed my vinyl on the nail. Then I added a few drops of polish onto the brush and with my thumb splattered over the nail, I cleaned the brush in between each color by dipping it in a little cup with acetone or nail polish remover. I did not care to clean it completely, it was just to remove the excess of polish.
But please make sure you wear a glove.
Removed the vinyl when done with the colors.
Let dry and apply the topcoat.
Lo que hice:
Primero pinte la uña de color blanco y lo deje secar completamente.
Luego coloque el vinilo sobre la uña. Luego agregue unas cuantas gotitas de esmalte en el cepillo y lo salpique sobre esta, limpie el cepillo entre cada color sumergiendolo en un basito con quita esmalte. No me importo limpiarlo completamente, fue solo para quita el exceso de color.
Pero porfavor usa un guante.
Quite el vinilo cuando termine con los colores.
Deje secar y aplique mi topocat.

These vinyls are from Snail Vinyls
They have a lot of different designs on their page, these are super easy to use. At the beginning can be a little tricky specially if it is the first time you use them, like me, this is my fourth attempt using them and I got very neat results. Awesome!
Estos vinilos son de Snail Vinyls
Tienen diferentes diseños en su pagina, estos son muy faciles de usar. Al principio puede ser un poco complicado, especialmente si es la primera vez que los usas, como yo. Este es mi cuarta vez y ahora tengo resultados muy limpios. Genial!
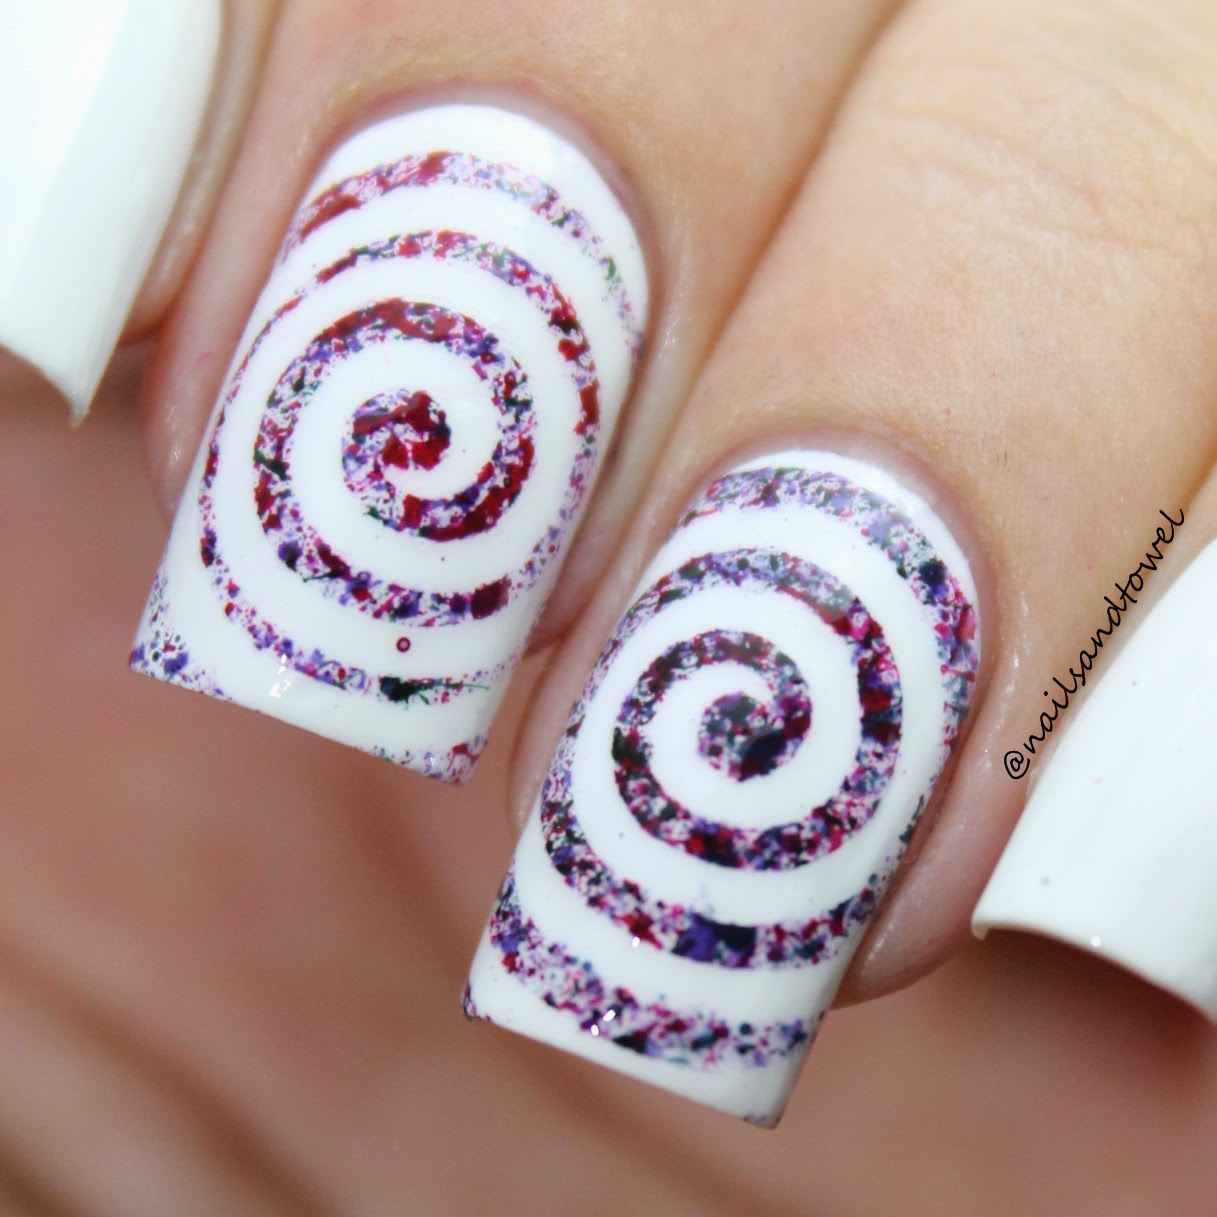 |
| close up |
 |
| topcoat |
I hope you like this quick review
Have a great day.
Espero les haya gustado esta reseña
Tengan un buen dia.
© Copyright
All Right Reserved.
Todas las imagenes
estan sujetas a derecho de autor
No hay comentarios.:
Publicar un comentario