
These nails remind me of those dresses of the medieval age...
"Medieval Queen" nails
If they had nail art at that time, probably they would look like this
;)
Muy elegante el dia de hoy..
Estas uñas me recuerdan a esos vestidos de la era medieval..
Uñas al estilo "Reina Medieval"
Si el nail art existiera en esa epoca, probablemente se verian asi
;)


First thing first..
Since I was going to create a negative space, I always like to have a sheer base instead of just my bare nail or simple base coat..
So I used "Via Lactea" by Esmaltes Colorama.
It is a very sheer white base, I like this one because works amazing when I need to use vinyls, I don't even need to add topcoat and it dries really fast.
It also gives a shiny natural look to the nail, I guess it is perfect when doing a french manicure.
I did one coat on my middle, index and pinkie nails.
Since my pinkie has no design, yes i removed the sheer coat after.
Primero lo primero..
Como iba a crear un espacio negativo, siempre me gusta tener un tono transparente debajo en vez de solo mi uña desnuda o una simple base...
Asi que use "Via Lactea" de Esmaltes Colorama.
Es un esmalte blanco transparente, me gusta este porque trabaja muy bien cuando voy a usar algun tipo de platilla, no necesito usar topcoat y seca super rapido.
Tambien le da un look natural a la uña, creo que es perfecto para hacer una manicura francesa.
Di una capa en mis uñas del medio, indice y meñique.
Y como el meñique no tiene diseño, si .. quite esa capa transparente..

For the negative space I used 2 stripes for the exact thickness I needed.
The straight vinyl is from Snail Vinyls
www.snailvinyls.com
What I did:
I painted my nails with the sheer base and let dry completely.
I picked up 2 straight vinyls and placed them over the nail.
I painted with the dark polish and removed the vinyls right away.
When peeling off the vinyl is very important that the polish is still wet in this step.
Para el espacio negativo use 2 cintas para el grosor que necesitaba.
Estas plantillas rectas son de Snail Vinyls
www.snailvinyls.com
Lo que hice:
Pinte mis uñas con el esmalte transparente y lo deje secar completamente.
Agarre 2 cintas y las coloque sobre la uña.
Pinte con el esmalte oscuro y quite las platillas de una vez.
Cuando se quitan las platillas, es importante no dejar secar el esmalte en este paso.
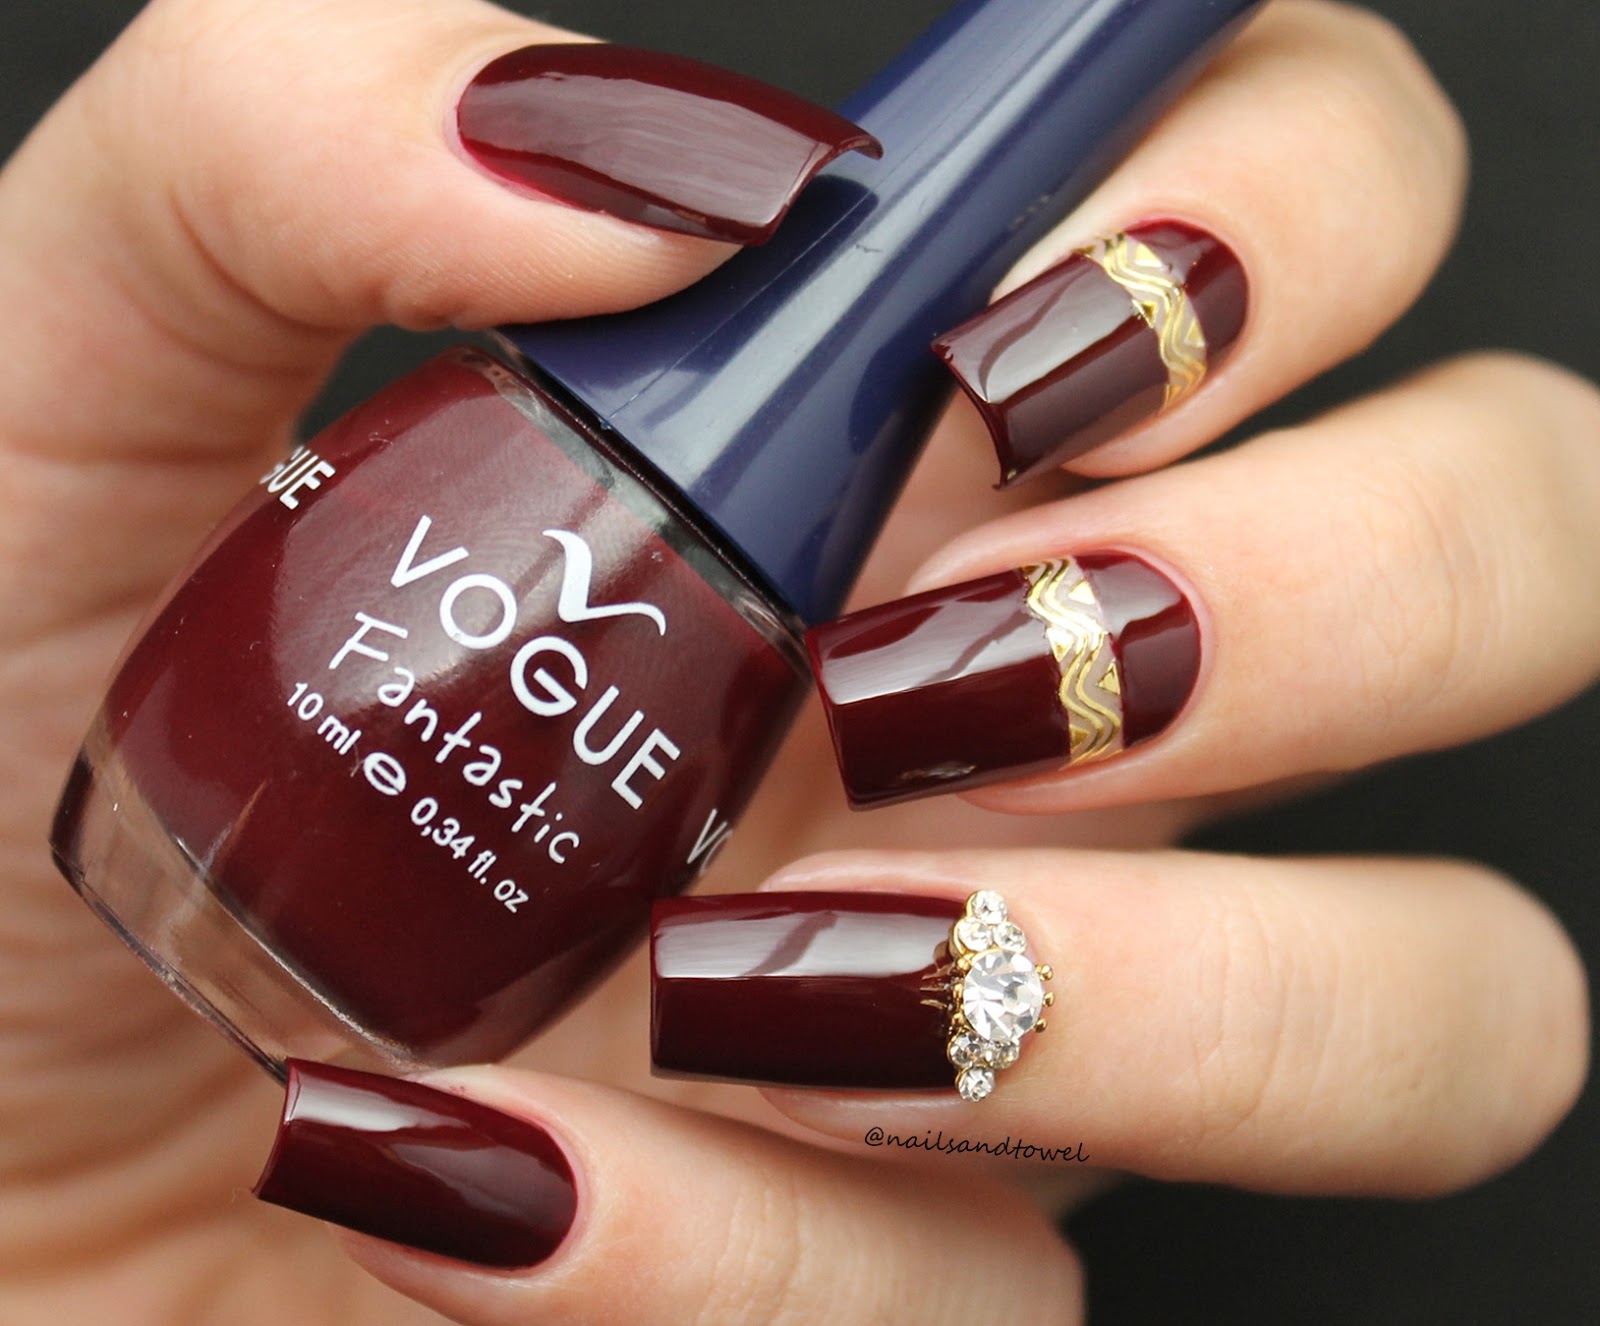
Look at that red.. OMG 'o' ..
This is "Rojo Cereza" by Vogue Fantastic / Cosmeticos Vogue.
Is a deep dark red shade that I want to eat.. Its formula is soooooo creamy and smooth.. ahhh I love it.
This one may cover in just 2 easy coats.. Since my nails are so long I needed 3 thin coats.
Miren ese rojo OMG! 'o' ...
Este es "Rojo Cereza" de Vogue Fantastic / Cosmeticos Vogue.
Es un profundo color rojo oscuro el cual me quiero comer.. Su formula es taaaaaan cremosa y suave.. ahhh lo amo.
Este puede que cubra con tan solo 2 capas.. Ya que mis uñas estan un poco largas, yo necesite 3 capas.


For the wavy design I used some stickers.
I found these at a local beauty supply store, they cost me maybe $1.00 approximately.
Simply peeled them off the sheet, cut a little piece and stick them to the nail. Easy.
Para el diseño ondulado use algunos stickers.
Los encontre en una tienda local de belleza, me costaron $1.00 talves, aproximadamente.
Simplemente los quite del papelito, corte un pedazo y lo pegue sobre la uña. Facil.

Since I waned a very glossy finish, I used "Super Shine" by Sally Hansen.
Como quise que mi acabado fuera muy brillante, use "Super Shine" topcoat de Sally Hansen.


My super gorgeous crown charm is from Daily Charme
www.dailycharme.com
This one is "Alice's Tiara"
After I added my topcoat I placed the charm while it was still wet. This is how I stick the charms to the nail.
If you want the charm to last longer on the nail, you can use nail glue.
El adorno de corona es de Daily Charme
www.dailycharme.com
Este se llama "Alice's Tiara"
Luego de aplicar el topcoat coloque el adorno donde queria mientras este aun estaba humedo. Asi es como yo pego los adornos a las uñas.
Si quieren que les dure mas, pueden usar un pegamento para uñas.


Although this is a simple design, it looks so elegant and I'm very happy with the result.
The middi ring I'm using is from a local store, comes in a pack of 4 different rings, one for each nail and cost me $0.99 =D
Aunque este sea un diseño simple, se ve muy elegante y estoy muy contenta con el resultado.
El anillo que tengo es de un almacén, vino en un paquete de 4 anillos, uno para cada dedo, y me costo $0.99 =D

Hope you like it...
And I also hope you like the new image of my blog
Espero les guste...
Tambien espero les guste la nueva imagen de mi blog
No hay comentarios.:
Publicar un comentario